


Janelle


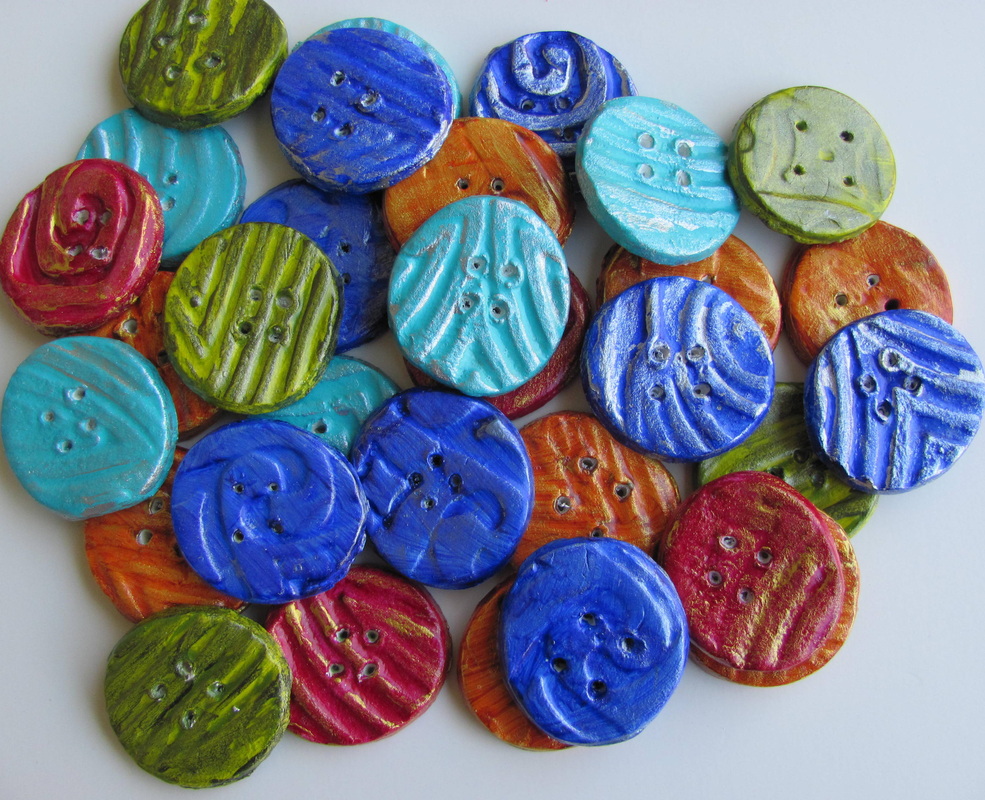
I have been making embellishments out of air dry clay this month. Each one is unique.
I roll out the clay and use texture plates or stamps to add the designs. Then I cut out the shapes, smooth them and let them dry. After they are dry I gesso each one. Next comes two layers of paint. I use metallic paint on the top layer to highlight the texture. After all the paint is dry I add two layers of varnish for protection. These take a lot of time since I have to let them dry in between each layer. Use these embellishments for all your fiber art, mixed media art, journal making or scrapbooks, among others. They aren't intended for washing and drying, but they are perfect for adding something special to a piece of art. They will be up for sale soon, but contact me if you want one before I get them listed. 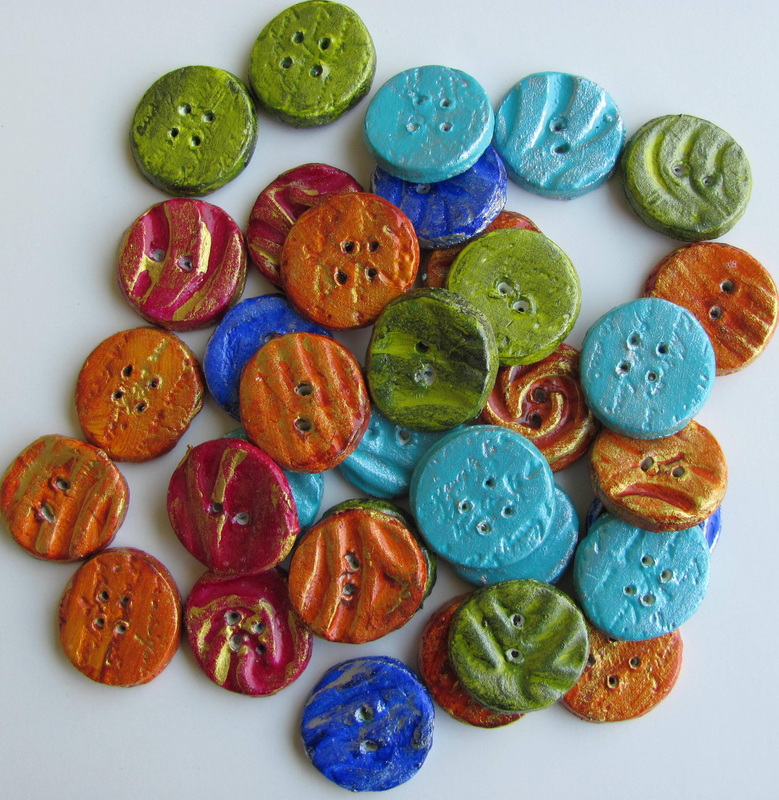 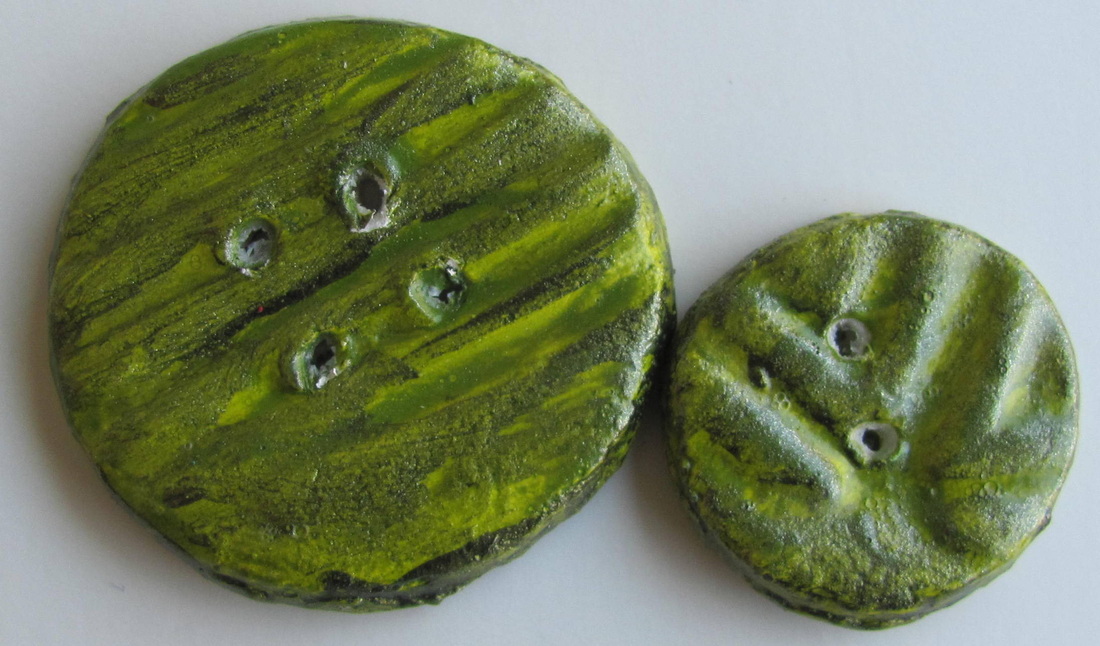 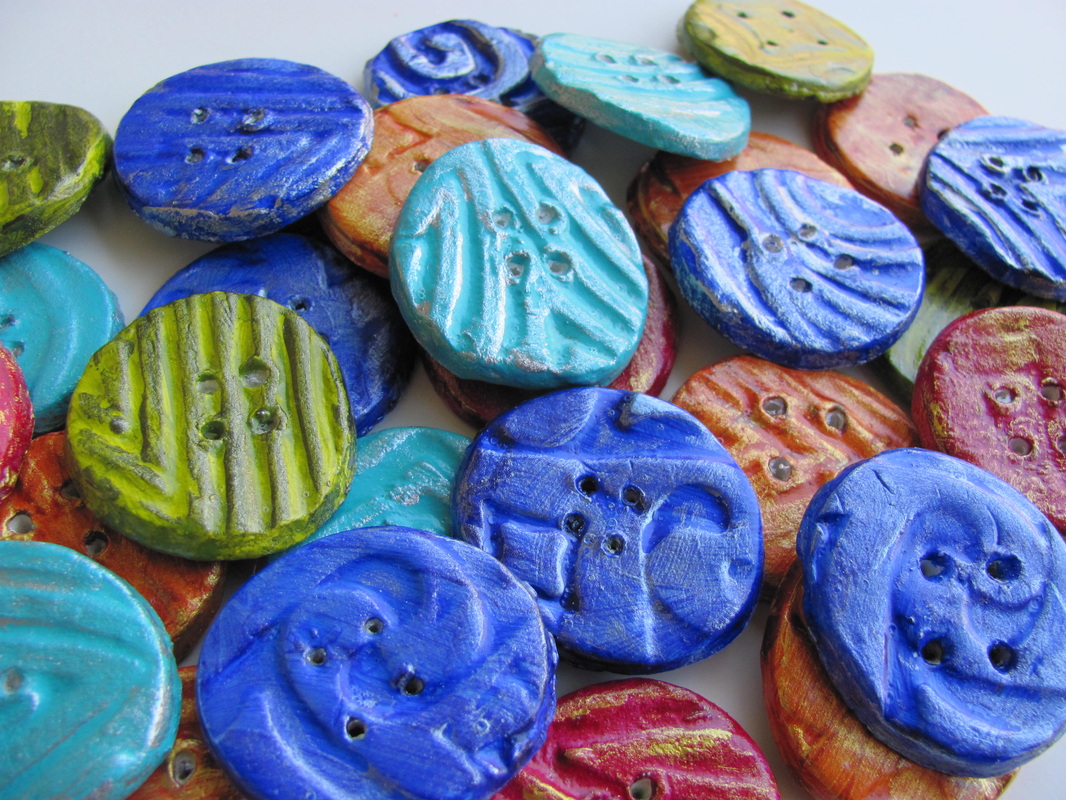 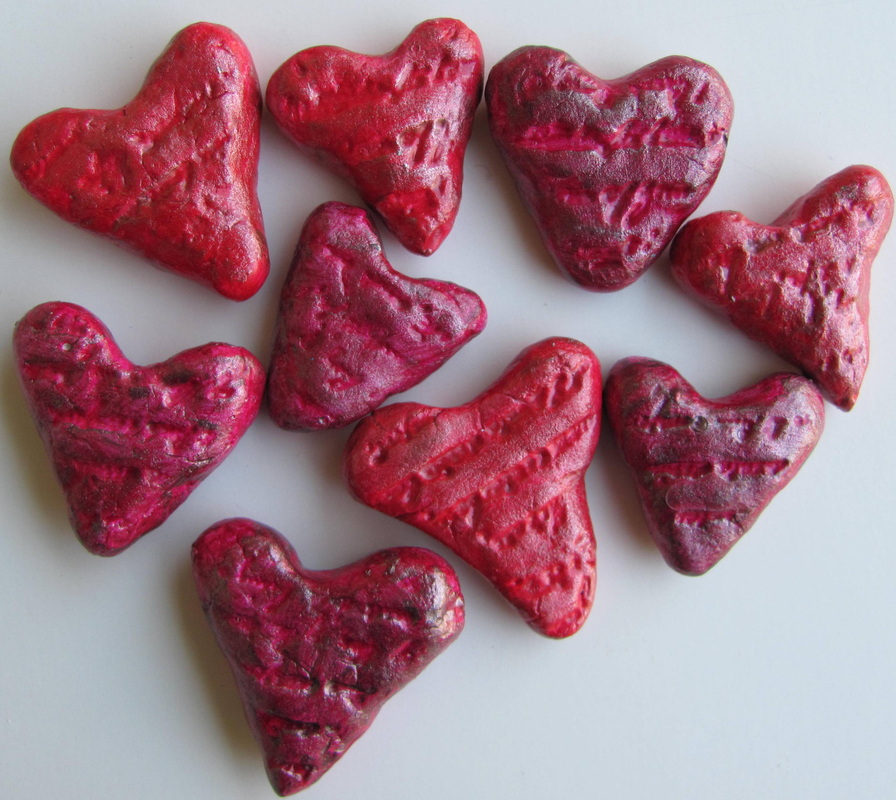
What possibilities can you imagine for these little gems?
Have a great weekend, Janelle |


