Monday, March 31, 2014

Process of Creating "Windows Into Another World"

I finished all of the background layers of this painting over the weekend.  It is complex and a bit chaotic, which is like me.  I have made a few other paintings in this style and have one more still in progress that I hope to finish by this summer.  I am drawn to create paintings that are full of personal symbols, colors, and words.  Even if most of these elements are covered up in the final painting they are still embedded into the painting. Part of my soul will travel with it wherever it goes.  I hope that you enjoy this peak into my process.
Picture
Picture
Picture
Picture
Picture
I have already started the final focal layers which I will share with you soon.  I aim for this painting to be whimsical and happy, but not overly bright.  Check back soon to keep up with my progress.
Janelle

Thursday, March 27, 2014

How To Create Windows Into Another World

I watched a video of Donna Downey painting an abstract painting and was inspired to do the same.  I'm not trying to copy her painting, just the general feeling of windows peeking into another world.  I am drawn to this style of painting and love to create my own abstracts.
I started with paint swirling in water on my canvas and let that dry for my first layer.  I didn't water down all the paint and let some intense areas remain on the canvas. (Someday I want to try the Golden high flow acrylics for this kind of painting.)
Picture
After the first layer was dry I added another layer using fluid acrylic paint, acrylic spray paint through a stencil, watered down acrylic paint in a thin tipped bottle, and Sharpie paint markers.
Picture
I want to add layers upon layers until I have a complex and interesting background.  I have already added another layer, but I will have to share that later after the paint dries.

Keep checking back to see the progress of this painting.  Feel free to comment and tell me what you like about it.  What is your favorite style of painting?
Janelle
Keep up with my art here: www.handsandharts.com

Saturday, March 22, 2014

Dreaming

"Dreaming" the whole cloth quilt that I made last fall is now on display at a local museum.  It is in Ella Sharp museum on the wall of art next to the community room.  If you live in the area please go and take a look.  There are many wonderful pieces of art on the wall along with mine, from members of the Jackson Civic Art Association.   
Picture
Here I am next to my quilt. My little helper had fun being there with me.
Picture
This quilt transports you back to childhood to explore the world of daydreams.  The girl is dreaming about who she could be. Where will you allow your dreams to take you? 

This quilt is 15” X 33”.  It is a whole cloth cotton quilt that was hand painted. After the first layer of painting was done it was heavily quilted to bring out the details.  Then it was painted with metallic paint to add accents to certain parts.  The edges are finished with a satin stitch. 
It is ready to hang from a dowel or rod by a hanging sleeve on the back.  This art quilt is $260.00.

I am quite excited to have this quilt hanging in a public venue. Thanks for sharing this moment with me.
Janelle

Thursday, March 20, 2014

T-shirts for the Summer

A couple of weeks ago I dyed a lot of fabric and trims.  I had a couple of t-shirts and a baby bunting laying around that were ready to dye, so I decided to dye them too.
Picture
T-shirt
Picture
Baby Bunting
Picture
T-shirt
After they were dyed I thought that it would be fun to add some stenciling and make these fun to wear.  Now, when I know someone who has a baby girl, I have a gift to give that will be all ready to go.  I also have a couple of colorful t-shirts to wear when it finally gets warm where I live.

I stenciled Tam's Butterfly Wings and Flower Garden onto the baby bunting.  These were perfect for a sweet baby girl.
I used the Tumbling Pods stencil to add a design across the pink and blue t-shirt.  I stenciled with white fabric paint.  I love how the white design shows off the colors.
Picture
I added more layers to the last t-shirt.  I started with the Apparatus stencil and black paint. I made a strip across the shirt and feathered out the black paint along the edges.
Picture
I added some more stenciling using black paint along one side.
Picture
After these layers dried I used a script stamp and white paint to add some visual texture.
Picture
To finish off this design I used a hand carved flower stamp to add some pink flowers in the swirls.
Picture
Picture
I hope you enjoyed my mini tutorial and have a great week.
Janelle
I also have a blog series over at my website telling how I got to wear I am today.  You can read that at  http://www.handsandharts.com/blog.html    

Thursday, March 13, 2014

Adventures in Fabric Dyeing

Last week my daughter and I dyed a lot of fabric all at the same time.  I like to make stockpiles of fabric that I can use for a long time to create textile art. Since it is still really snowy where I live, I snow dyed some of the fabric.  Snow dyeing creates wonderful patterns on the fabric and the colors end up being more pastel too.  I dyed cotton fabric and cheesecloth using snow dyeing.  I also dyed silk fabric, silk and rayon ribbon, lace, and thread. I chose some colorways and used the same ones to dye a variety of materials.  That way I have coordinating supplies to use.

I started out with a pile of stuff to dye.


I first mix up all the dyes with the chemicals that I want to use this time.

Here I have all my dyes mixed and in their own bottles. 

Before I can dye the fabric I soak each piece in a mixture of soda ash and water.  The soda ash allows the dye to bond to the fibers and become permanent.  Then I loosely scrunch up each piece that I am dyeing.  You can use many types of folds, but here I didn't fold the fabric.  I wanted a more organic pattern this time.  For the snow dyeing I placed the fabric on a screen over a tub, so that the melted snow and dye don't pool around the fabric. I placed the regularly dyed items in containers with lids.  

My daughter brought in the snow and piled it on top of the fabric until each pile was covered.  Then I squirted the dye onto the snow.  I used three colors on each pile.  I wear old clothes and gloves because the dye will stain everything.  I cover the other pieces the same way, minus the snow.  

Here are all the snow piles with dye on top.  I cover these with old plastic bags and let them sit overnight.  
Here are all the fabric piles the next morning before I rinsed off the extra dye. 


This is the rest of the stuff that I dyed sitting in the tubs soaking to get off all the extra dye.  I rinse everything with cool water and then I soak them in cool water.  Then I do the same thing with hot water and a detergent to get off all the extra dye.  The dye does bond to the fiber, but there is always more dye than could bond that has to be washed off.  It takes several wash cycles to get the fabric all washed out.  The more delicate fibers I hand wash.  I try and use as little water as I can, so that I'm not wasting water at all.  The soaking helps to get the dye out without having to keep the fabric under running water the whole time. 
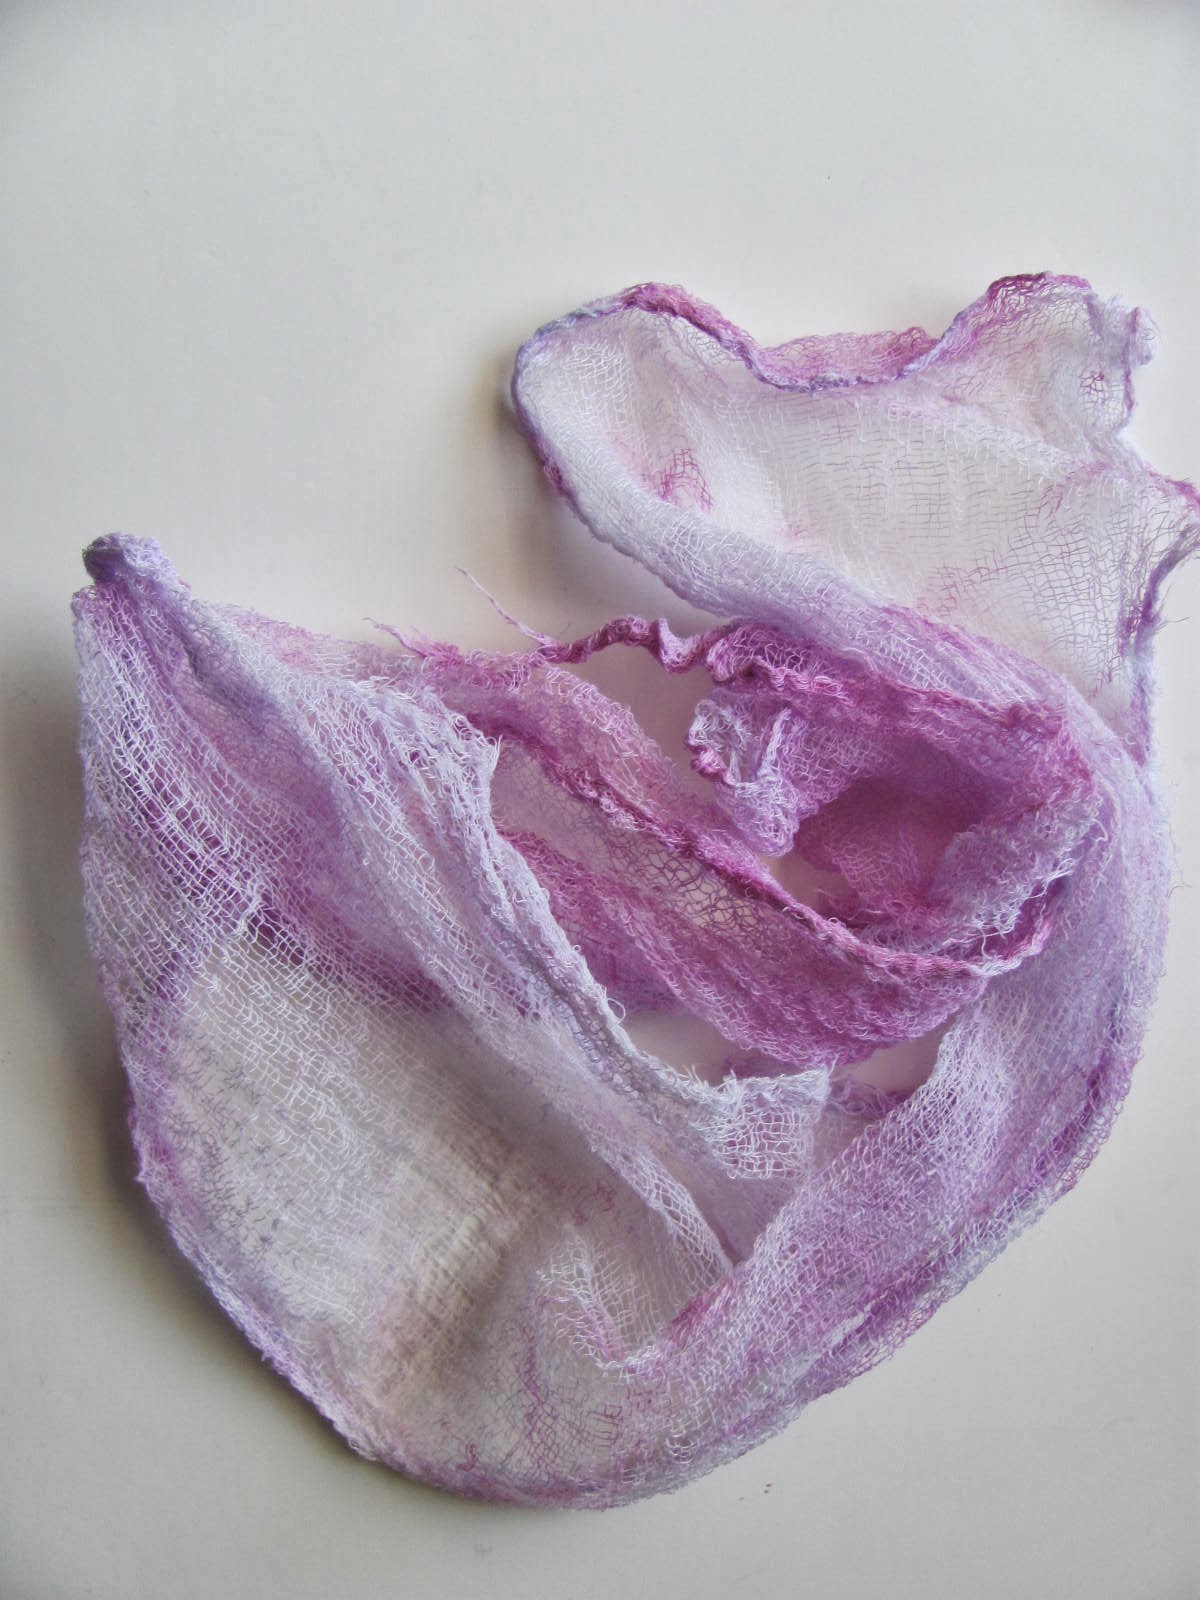
Here is all the snow dyed cotton and cheesecloth from this round of dyeing.  I hadn't ironed the fabric yet in these pictures.  Some of the pieces came out really pale, so I may over-dye them to get more color into the fabric.
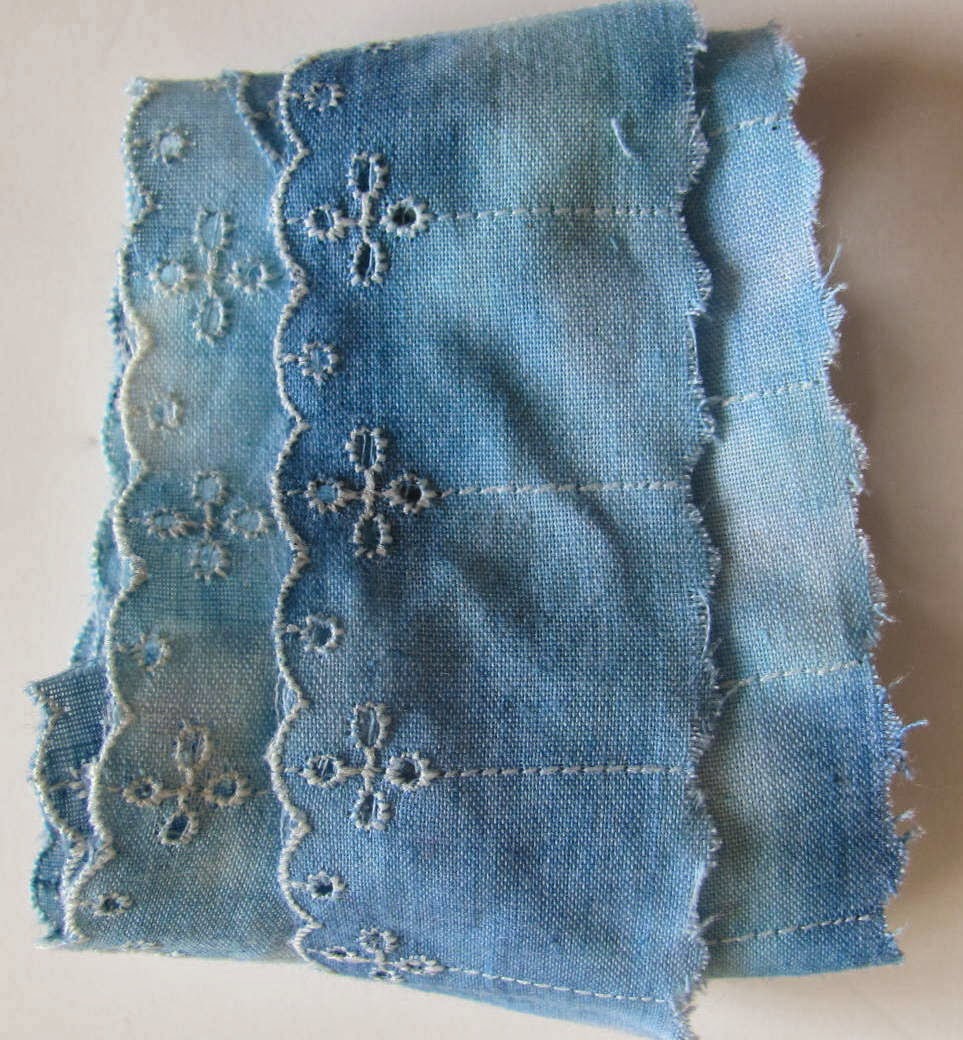


Here is all the silk fabric and ribbons that I dyed.  Since I didn't use snow on top of these the colors came out a little more vibrant.


Here are all the threads, laces, and rayon ribbons that I dyed. 


I hope that I didn't bore you too much with my dyeing post.  I love fabric dyeing. Seeing how each piece turns out when it is all washed is exciting to me.  If you have any questions I will do my best to answer them.  Keep watching to see when these pieces turn up in my textile art.
Thanks,
Janelle


 You can check out more of my art at my website http://www.handsandharts.com/